Select Settings, from side menu. Go to tab Google Street View.
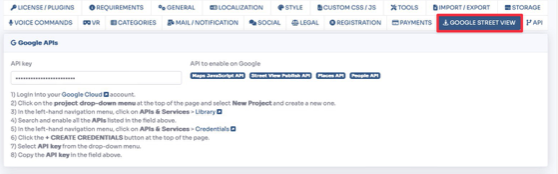
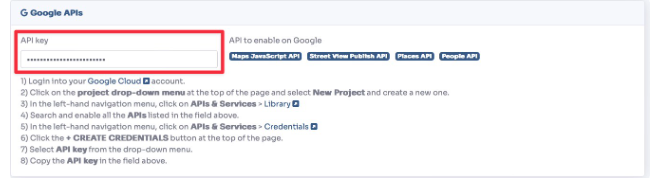
Google APIs
1) Login into your Google Cloud account.
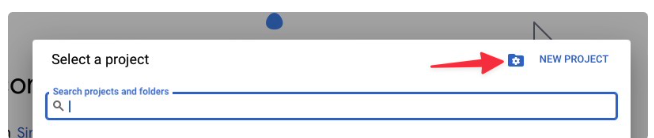
2) Click on the project drop-down menu at the top of the page and select New Project and create a new one.
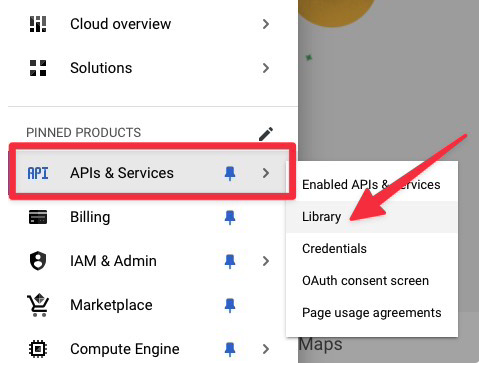
3) In the left-hand navigation menu, click on APIs & Services > Library
4) Search and enable all the APIs listed in the field above.
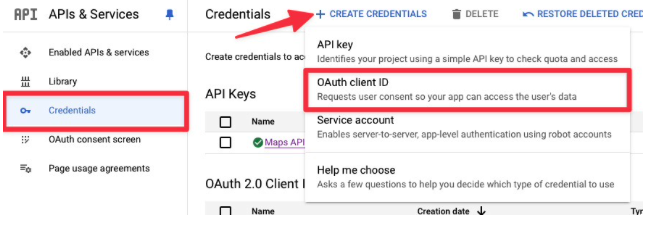
5) In the left-hand navigation menu, click on APIs & Services > Credentials
6) Click the + CREATE CREDENTIALS button at the top of the page.
7) Select API key from the drop-down menu.
8) Copy the API key in the field above.
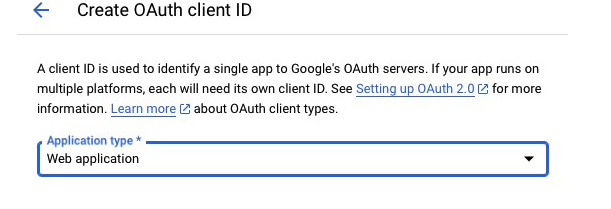
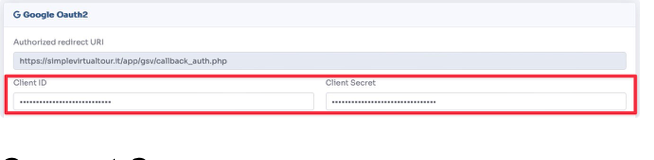
Google Oauth2
1) In the left-hand navigation menu, click on APIs & Services > Credentials
2) Click the + CREATE CREDENTIALS button at the top of the page.
3) Select OAuth client ID from the drop-down menu.

4) As application type select Web application.
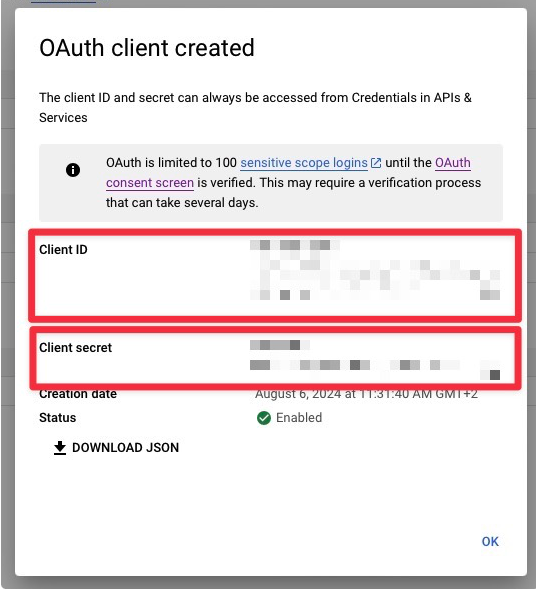
5) Click the + ADD URI button in the Authorized redirect URIs section and enter the corresponding link you find above.

6) Click the CREATE button and copy the Client ID and Client Secret in the fields above.
Consent Screen
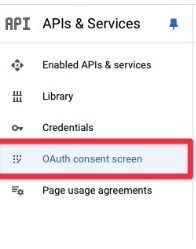
1) In the left-hand navigation menu, click on APIs & Services > OAuth consent screen
2) Follow the on-screen instructions to create and configure your consent screen.
As Application Type choose External.
Fill these informations:
application name: your application name
application home page: https://******/backend/login
application privacy policy link: write your inside settings - legal - privacy policy, and then put this link https://******/backend/login?privacy
application term of service link: write your inside settings - legal - terms and conditions, and then put this link https://******/backend/login?terms
authorized domain: your main domain link ******
On Scope section add these: People API (../auth/userinfo.profile) and Street View Publish API (.../auth/streetviewpublish)
3) Once the application is finished and tested you can proceed with publishing.